Before You Go — Get BrandBoa Updates Top Products, Shed Plans & Estimating Tips
Join homeowners, DIY builders & contractors
Subscribe to receive construction product recommendations, shed plan updates, BOQ tips, and useful buying guides for tools, materials, finishes, and building essentials. We’ll help you discover selected products from trusted USA suppliers and share practical ideas to plan, price, and build smarter.
Walking into a newly finished room feels great—until you notice a crooked tile and wonder what else they missed behind the drywall. Figuring out how to assess the quality of construction work feels overwhelming when distinguishing between cosmetic “eye candy” and true structural integrity. According to home inspection professionals, most buyers judge spaces purely by fresh paint, missing crucial hidden warning signs.
True craftsmanship goes far beyond legal minimums. You might assume passing a local inspection guarantees excellence, but building codes simply mandate basic safety. Think of code compliance as a standard driving test; it proves the contractor is safe, not highly skilled. A meaningful building quality check looks past these baseline legal requirements to evaluate the actual care poured into your project.
Fortunately, you do not need an engineering degree to spot contractor shortcuts. By conducting a straightforward “3-layer audit,” anyone can master a proper construction quality assessment. This framework breaks inspections into three manageable steps: examining the Surface for visual flaws, testing the Function of moving doors or drawers, and inspecting the Skeleton for proper physical alignment.
Why ‘Plumb, Square, and Level’ Are Your Best Friends
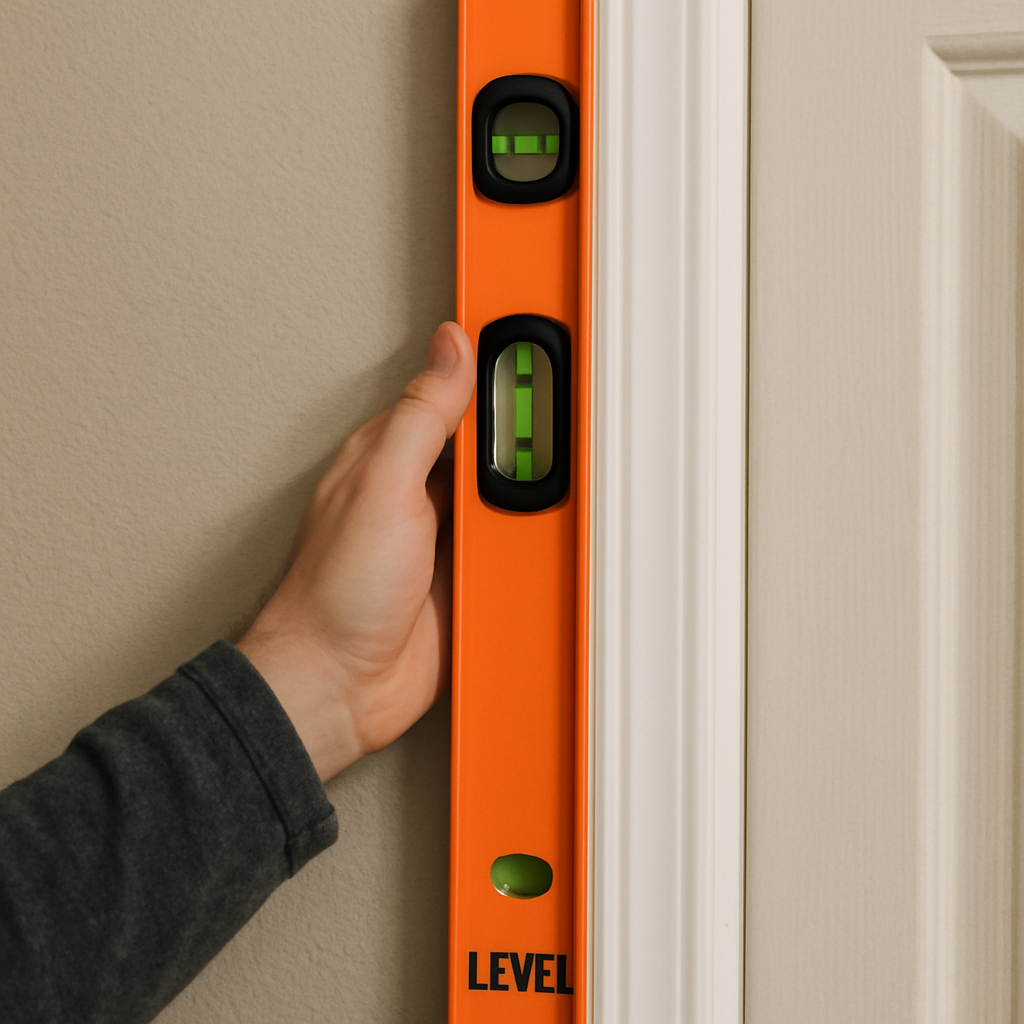
Since framing acts as your home’s skeleton, you must verify that surfaces are perfectly horizontal (“level”) and perfectly vertical (“plumb”). You can easily do this with 3 simple tools every homeowner should carry: a 4-foot level, a tape measure, and a flashlight.
Spotting signs of poor structural workmanship starts with a basic gravity test. If a door frame leans out of plumb, the door will eventually swing shut on its own. Next, try the “Credit Card Test” along your baseboards. If you can easily slide a credit card into a gap where the wall trim meets the floor, your flooring was laid unevenly.
Room corners require another reliable trick to guarantee they are perfectly “square,” meaning an exact 90-degree angle. Grab your tape measure to use the 3-4-5 rule: measure 3 feet down one wall, 4 feet down the adjoining wall, and the diagonal connecting those marks must be exactly 5 feet. Master these practical quality evaluation methods to verify your interior bones are solid.
Evaluating the ‘Skin’ of Your Home: Exterior Cladding and Roofing
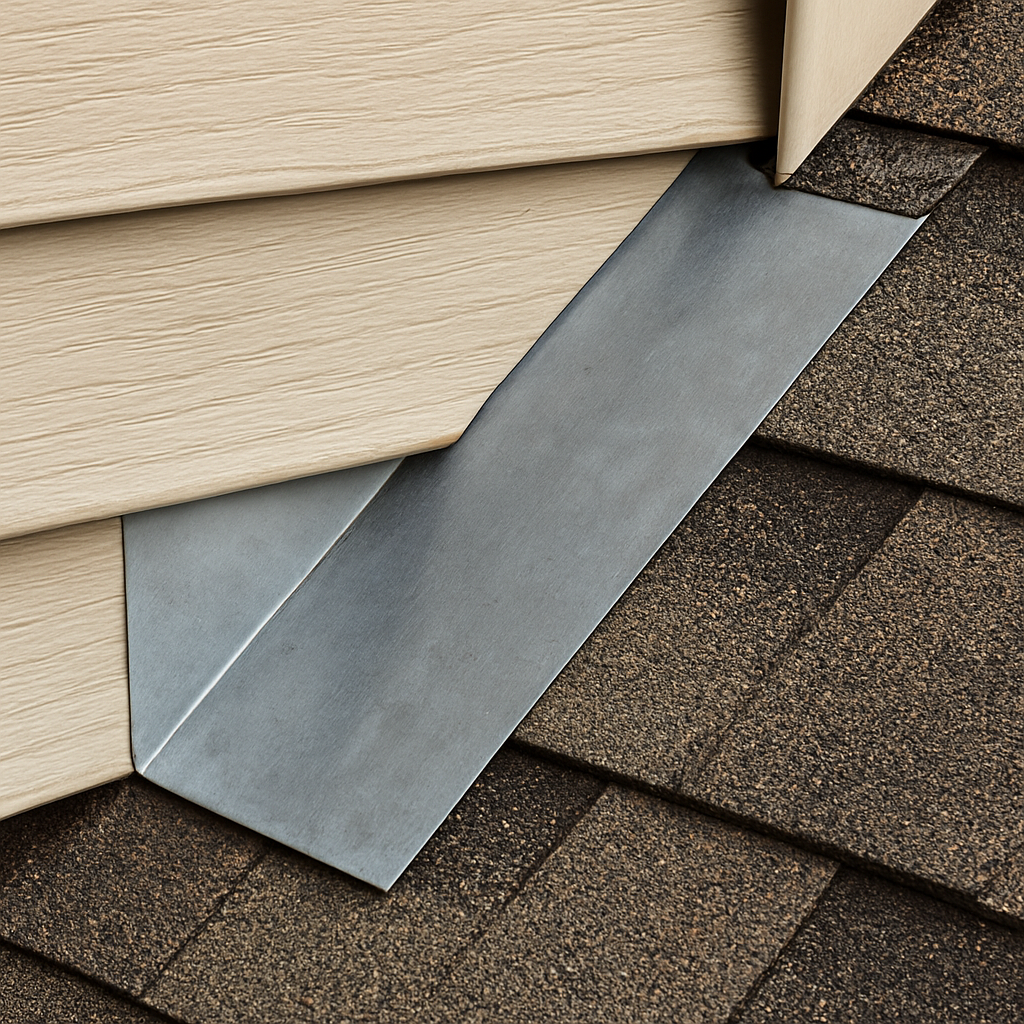
Think of your home’s exterior like a person wearing a raincoat. The siding is the coat, but the “flashing”—thin metal sheets directing water away from vulnerable joints—acts like tucked-in waterproof seams at the neck and wrists. When assessing exterior cladding and roofing quality, look closely where a slanted roof meets a vertical wall. This metal flashing must tuck smoothly under the siding and lay over the shingles. If reversed, water slides right underneath, making the raincoat useless.
Looking up at the roofline gives you an easy visual win for moisture ingress detection. Watch how your basic roof shingles hang off the bottom edge. They must extend slightly past the roof’s border, supported by a “drip edge”—an angled metal strip that forces rainwater directly down into the gutter. Without this strip, water curls backward, quietly rotting the wooden boards behind your gutters over time.
Finally, perform a building quality check on the siding itself. Wide, uneven gaps between panels often indicate poor insulation and “thermal bridging,” a flaw where outside temperatures easily bypass the protective layer. Just as gaps in your home’s skin compromise its defense against the elements, hidden weaknesses deeper inside are equally dangerous.
Identifying Substandard Framing and Foundation Integrity
Seeing basement cracks can immediately trigger alarm bells. However, not all fissures mean your house is sinking. Hairline fractures are usually “curing cracks,” happening naturally as wet concrete shrinks and dries out over time. You should only worry about “settlement cracks”—gaps wider than a quarter-inch, or staircase-shaped splits—which indicate the earth is physically shifting beneath the weight of a load-bearing wall.
Above ground, evaluating framing and foundation integrity means checking the vertical “bones” hidden behind your rooms. Wall support boards, known as “studs,” act like the perfectly straight legs of a dining table. If a contractor installs warped wood, the attached drywall will eventually look wavy. Shine a flashlight flat against the wall; harsh shadows will quickly reveal these hidden dips and bows.
Unfinished crawlspaces expose horizontal floor supports called “joists.” Tradesmen sometimes cut chunks out of these beams to run pipes, a necessary practice called “notching.” Over-notched joists, where deep sections are carelessly hacked away, are glaring signs of poor structural workmanship that severely weaken the floor above. Discovering heavily damaged beams often triggers structural engineer report requirements to verify the home remains safely supported.
Just as compromised bones weaken a physical body, hidden structural shortcuts leave your home deeply vulnerable. Once you verify this internal skeleton is strong, you must ensure its protective barriers actually work. A perfectly straight wall still fails if it leaks.
Detecting Moisture Ingress and Thermal Performance
Think of insulation like a thick winter coat; squeezing the fluffy stuffing stops it from keeping you warm. When inspecting unfinished walls, look for “compression”—areas where fiberglass is forcefully jammed around pipes or wires. Squishing this material destroys its “R-value,” the grading system measuring how well it resists heat transfer. Properly checking thermal insulation performance means ensuring these fluffy batts fit snugly without being crushed.
Exterior window installations require a simple “Flashlight Test” to verify their invisible defenses. Have someone stand outside at night shining a bright beam around the frames while you watch from a dark interior room. Light piercing through the edges indicates a “seal failure.” This gap allows water and cold air to easily penetrate, failing basic ASTM international construction standards for weatherproofing.
Catching these thermal leaks prevents much larger headaches, since drafts inevitably bring dampness. To master moisture ingress detection in new builds, inspect these four high-risk zones for early signs of mold or soft drywall:
Bottom corners of window frames
Concrete joints in basement corners
Cabinet bases directly under sinks
Ceilings situated just below upstairs bathrooms
Once you confirm the home is completely dry and weather-tight, you can safely turn your attention toward the internal utilities.
Spotting Red Flags in Plumbing and Electrical
Your breaker box reveals the true care put into your home’s hidden systems. Spotting a “bird’s nest” of tangled, chaotic wires strongly indicates rushed labor that cuts corners. Professional cable management looks like a neat highway of straight lines, making identifying substandard plumbing and electrical installations much easier across the entire house.
Near sinks and wet areas, always inspect the wall outlets. True contractor quality is verified by the presence of GFCI (Ground Fault Circuit Interrupter) receptacles. These crucial safety devices feature small “test” buttons that act as tiny, localized breakers, instantly cutting power if water splashes to provide a mandatory shield against accidental shocks.
Plumbing requires an auditory test rather than a visual one. Turn a faucet on high, then shut it off rapidly; a loud, jarring thud behind the wall is a symptom called “water hammer.” This bang means pipes lack proper securing straps, failing basic quality control construction standards. Once these critical mechanical utilities pass your audit, you can finally evaluate the visible surfaces.
The Final Finish: Drywall, Paint, and Flooring
Walking into a newly painted room feels like the finish line, but overhead lighting often hides mistakes. You can use the “side-lighting” trick to truly evaluate the walls. Hold a flashlight flat against the wall, shining the beam parallel to the surface. This harsh angle shows exactly how to spot uneven flooring and drywall defects, instantly revealing bulging seams or sanding marks that professionals would smooth away.
Look down, as floors often hide common residential construction red flags. Tap a coin across fresh tiles; a hollow sound means missing mortar beneath, virtually guaranteeing future cracks. You should also watch for “grout telegraphing”—when an uneven subfloor creates ridges that show through soft vinyl or linoleum. Finally, test the doorways. The “transition strips”—the metal or wood thresholds connecting two different floor types—must lay perfectly flush, never acting as unexpected trip hazards.
Before approving the work, confirm basic building code compliance verification and aesthetic standards. Always run through the ‘Finish Quality Checklist’:
Consistent grout lines
Smooth drywall joints
No paint ‘overspray’ on fixtures
Once you find these final flaws, you need a formal system to get them corrected.
How to Use a Punch List for Final Accountability
Spotting flaws isn’t about starting arguments; it is about building a “Punch List.” This document is a formal inventory of minor defects requiring correction before the job ends. Tagging physical issues with painter’s tape helps you master the professional walkthrough protocol. The importance of construction punch list completion is immense, as it legally documents contractor quality.
Instead of debating whether a baseboard gap is too large, cite “Industry Tolerances.” These are the official building guidelines defining acceptable margins of error. Discussing these specific standards keeps your repair requests objective and completely non-confrontational. You are simply verifying architectural specification adherence, which commands immediate respect from any tradesperson.
Think of your project budget like a safety net. The “Retention payment”—usually the final ten percent of the contract money—is your primary leverage, securely held back until every list item is entirely fixed. Releasing these funds early removes all accountability. Once the work completely meets your standard, you hand over the check.
Your 48-Hour Action Plan for a Quality Home
You no longer have to hope the drywall hides good craftsmanship. By combining visual, functional, and invisible checks, you now know how to assess the quality of construction work like a seasoned pro. You can easily distinguish between minor cosmetic quirks and failing construction quality metrics that demand attention.
If your walk-through reveals gaps, misalignments, or functional failures, take control with this simple action plan:
Document: Take clear photos and note the exact location of the issue.
Compare: Review your contract to ensure the work matches the agreed-upon specs.
Consult: Bring these facts to your contractor professionally.
For everyday finishes, trust your own eyes and tools. However, if you spot serious structural red flags like leaning frames or persistent moisture, it is time to weigh a professional building inspector vs DIY assessment. A trained expert can safely diagnose the deeper issues your audit uncovers. You are no longer just a bystander hoping for the best; you are an empowered homeowner ready to protect your investment.
Newsletter Updates
Enter your email address below and subscribe to our newsletter