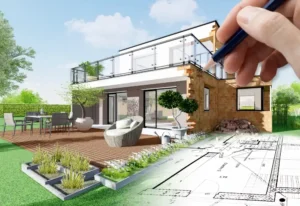
Whether you need extra storage, a workshop, or a garden retreat, choosing the right shed plans is the first step toward a successful outdoor project. A well-designed shed not only improves property organization but also increases functionality and long-term value. From compact garden sheds to large workshop spaces, the right design helps homeowners avoid costly mistakes during construction.
Many homeowners begin with a simple DIY shed project because it offers flexibility and cost savings compared to buying a pre-built structure. Before starting, it is important to understand the materials, layout, foundation requirements, and structural considerations involved in the project. This is why planning your material selection carefully is essential. Our pillar guide on Project Specific Materials explains how choosing the correct materials for each construction project can improve durability, weather resistance, and long-term performance.
Choosing the Right Shed Plans for Your Property
Not all shed plans are designed for the same purpose. Some are optimized for storage, while others are created for workshops, gardening equipment, or even small office spaces. Before selecting a plan, consider the available outdoor space, local regulations, roof style, ventilation, and the type of materials you intend to use.
For example, homeowners looking to build a shed for heavy-duty storage may benefit from pressure-treated timber framing and reinforced flooring systems. Meanwhile, a garden shed may prioritize aesthetics, natural lighting, and easy access. Roof pitch is another important factor because it affects drainage performance and internal headroom.
A good set of shed plans should include:
- Foundation layout
- Framing dimensions
- Roofing structure
- Door and window placement
- Material quantities
- Ventilation details
- Step-by-step construction guidance
Choosing quality plans early reduces waste, improves construction efficiency, and helps avoid structural issues later in the project.
DIY Shed Projects: Why Planning Matters
A successful DIY shed project depends heavily on preparation. Many first-time builders underestimate the importance of foundations, weatherproofing, and material compatibility. Poor planning can lead to moisture damage, warped timber, unstable flooring, and reduced lifespan.
One of the biggest advantages of DIY construction is customization. Homeowners can modify shed plans to include shelving systems, workbenches, skylights, or extra storage compartments. However, customization should always work within structural limitations.
When selecting materials, factors such as climate, maintenance, and intended usage should be considered carefully. Exterior cladding, roofing panels, insulation, and framing timber all influence the durability of the finished shed. Understanding how project-specific materials perform in different environments is critical for achieving professional-quality results. This is especially important when building outdoor structures exposed to changing weather conditions.
Additionally, using modern building methods and durable materials can significantly improve energy efficiency and reduce future maintenance costs.
How to Build a Shed Step by Step
If you want to build a shed, following a structured process makes construction easier and more manageable. While every project differs depending on size and design, most shed builds follow the same core stages.
1. Prepare the Foundation
The foundation supports the entire structure. Common options include concrete slabs, timber skid foundations, and gravel bases. A level foundation prevents structural movement and drainage issues.
2. Build the Floor Frame
The floor frame forms the base of the shed. Pressure-treated timber is commonly used to protect against moisture and decay.
3. Construct the Wall Frames
Wall framing provides structural stability and defines the layout of doors and windows. Accurate measurements are essential during this stage.
4. Install Roof Structure
Roof framing depends on the chosen shed plans. Gable roofs are popular because they provide efficient drainage and additional attic space.
5. Add Cladding and Roofing Materials
Exterior finishes protect the structure from weather exposure. Metal roofing, timber cladding, and composite panels are common options for modern shed construction.
6. Final Finishing and Storage Layout
Once the exterior is complete, shelving, lighting, ventilation, and interior storage systems can be installed based on the intended use of the shed.
By following organized shed plans and selecting reliable construction materials, homeowners can complete a professional-quality shed project that lasts for years.
Why Shed Plans Are Becoming More Popular
The growing popularity of remote work, home organization, and outdoor living has increased demand for practical shed solutions across the United States. Many property owners now use sheds as workshops, hobby rooms, gyms, and garden offices rather than simple storage units.
This shift has also increased interest in high-quality shed plans that combine functionality with modern design. As more homeowners explore DIY shed projects, the importance of durable construction materials and proper planning continues to grow.
For builders and homeowners looking to improve project quality, understanding how materials perform in specific applications remains essential. You can explore more guidance on selecting the right materials for construction projects in our detailed Project Specific Materials guide.